Are you tired of manually adding chlorine to your pool and spending numerous hours maintaining it? Look no further than the Circupool RJ45, a cutting-edge salt chlorinator designed to make pool maintenance easier.
We will bring you through the step-by-step procedure on how to install Circupool RJ45, assuring a seamless and efficient setup, in this detailed tutorial.
We’ve got you covered, from situating the control module to connecting the electrolytic cell. Also, you need to know about the pool chemistry and the ideal data of chemical substances. Plus, we’ve gathered some data on how much chlorine you can generate for your pool. And if you run into trouble, we have got a troubleshooting section for that.
Say goodbye to the bother of traditional pool upkeep and hello to the Circupool RJ45’s ease. Let’s get started on the installation and revolutionize your pool maintenance experience.
How Cicrupool RJ45 Works
The Circupool RJ45 is a chlorine generator that produces a steady supply of chlorine for your pool, eliminating the need for human chlorine dosing. It works by converting salt molecules (NaCl) in water into chlorine through a process known as electrolysis.
A tiny electric charge is applied to a series of titanium plates inside the RJ45’s Electrolytic Cell. Sodium Hypochlorite (NaOCl) is produced as a result of this electrical reaction. In water, sodium hypochlorite dissociates into sodium (NA+) and hypochlorite (OCl-) ions.
Hypochlorite ions react with hydrogen (H+) ions in water to generate hypochlorous acid (HOCl). This potent substance functions as an active agent in the pool, eliminating bacteria, algae, and oxidizing organic debris. It dissolves quickly within the plumbing system, leaving just a slight residue in the pool water.
Furthermore, the RJ45’s Electrolytic Cell constantly “shocks” the entering water, effectively burning off oils, organic debris, and other particles that require oxidation. This procedure aids in the preservation of pure and clear water. Speaking of shocks, you should know how to shock a pool with chlorine tablets if you run into trouble with your chlorine generator.
One of the benefits of the Circupool RJ45 system is that the salt is constantly recycled. After cleaning the pool, the original salt molecules reform, allowing the entire process to begin again. This implies that the salt is neither eaten nor depleted during the chlorination process, giving a cost-effective and long-term option for pool maintenance.
The Circupool RJ45 offers effective and reliable chlorine generation by harnessing the power of electrolysis, keeping your pool clean and inviting without the need for manual chlorine handling.
Chlorine Generation with Circupool RJ45
Here is a chart showing how much chlorine Circupool RJ45 can generate and how much salt is required to be added, this may vary for different sizes of pools:
| Pool Size | Chlorine Production | Salt Requirement |
| Small | 0.75 – 1.5 lbs/day | 40 lbs/2,000 gallons |
| Medium | 1.5 – 2.5 lbs/day | 60 lbs/4,000 gallons |
| Large | 2.5 – 3.5 lbs/day | 80 lbs/6,000 gallons |
| X-Large | 3.5 – 4.5 lbs/day | 100 lbs/8,000 gallons |
The Circupool RJ45 produces different amounts of chlorine depending on the size of the pool.
The RJ45 can create up to 1.5 pounds of chlorine per day for small pools, ensuring excellent sanitization. Medium-sized pools can benefit from up to 2.5 pounds of chlorine per day, while bigger pools can enjoy up to 3.5 pounds per day. The RJ45 can produce up to 4.5 pounds of chlorine per day for extra-large pools, meeting increasing chlorine demand.
The Circupool RJ45 requires a precise amount of salt to be introduced to the pool in order to produce chlorine. The salt requirements are estimated based on the size of the pool. A modest pool (up to 2,000 gallons) requires about 40 pounds of salt.
A medium-sized pool (up to 4,000 gallons) will require approximately 60 pounds of salt. Larger pools (up to 6,000 gallons) require about 80 pounds of salt, while extra-large pools (up to 8,000 gallons) require about 100 pounds.
It’s crucial to note that these values are only suggestions; particular chlorine output and salt requirements will vary depending on factors including pool usage, climate, and water chemistry.
Additionally, for maximum operation and maintenance of the Circupool RJ45 system, review the manufacturer’s guidelines and follow their instructions. You should also get a proper idea of how long does a salt generator take to make chlorine. That way you can schedule your pool cleaning.
Pool owners can successfully maintain desired chlorine levels and provide a clean and healthy swimming environment by understanding the Circupool RJ45’s chlorine output and salt requirements dependent on pool size.
A Step-by-step Guide on How to Install Circupool RJ45
It is important to note that the installation of a chlorinator should not be done without proper guidance. This guide will provide you with all the information you need to ensure your pool is chlorinated properly.
Knowing the chemistry
It’s essential for you to know the pool’s chemistry before you start to either use or install your Circupool RJ45. But how can you get the ideal chemistry before establishing your chlorine generator? That’s why we are here.
The first thing you need to know is the pH level of your pool. Now, hear these words carefully, a pH level of anywhere above 7.8 will destroy the effectiveness of chlorine. You are required to make your pool’s pH level 7-7.8.
Below 7 will increase the acidity of your pool, which is not ideal for chlorine generation. There are some ways to test your pool’s pH level all by yourself. Some other chemicals play an important role here (like you either require them or need them to be removed).
- Nitrates and Phosphates (Their role is to be non-existent in the pool because they deplete the chlorine demands to zero, meaning you need their levels to be zero).
- Metals (They can cause chlorine loss, you need to remove if there are any metals in the pool).
- Cyanuric Acid (Also known as Chlorine Stabilizer, you need to keep them below 50 ppm, anywhere above 50 ppm will result in losing the effectiveness of chlorine).
- Total Dissolved Solids (Although the TDS does not affect the pool chemistry, you still need to make the pool professional aware of whether salt was added or not).
Enough about chemistry, let’s do some engineering work!
Gather the required tools
Before beginning the installation, make sure you have all of the necessary tools. A screwdriver, pliers, wire cutters, PVC primer and cement, and Teflon tape may be included. Having the correct equipment on hand will make the installation procedure go more smoothly and efficiently.
Select a location for installation
Choose a good place for the RJ45 chlorinator installation. According to industry standards, the chlorinator should be installed adjacent to the pool equipment area for convenient access. Consider the closeness of a power supply and the pool plumbing system as well to reduce installation complications.
Switch off the power and water supply
Before beginning any work, it is critical to switch off the power supply to the pool equipment at the circuit breaker. This preventive procedure safeguards the safety of the installation crew. Furthermore, stopping the pool’s main water supply valve prevents water flow and reduces potential hazards.
Set up the plumbing
Determine where the chlorinator will be installed in the pool’s piping system. Using the proper pipe cutter or saw, carefully cut the pipe at a convenient position. Maintaining clean and debris-free pipe ends will ensure a proper and secure connection.
Install the chlorinator cell housing
Attach the RJ45 chlorinator cell housing to the pipe by aligning the inlet and outlet ports with the pipe ends. It is critical to apply PVC primer and cement to both the pipe and the inside of the housing ports for a firm and long-lasting connection. Pipe ends that are properly secured into the housing ports will avoid leaks and ensure efficient chlorine distribution.
Connect the power cable
Connect the power wire included with the RJ45 chlorinator to the cell housing’s specified terminals. It is critical to ensure a solid and tight connection by appropriately tightening the terminal screws. This enables a safe and effective power transfer to the chlorinator.
Set up the control unit
Install the RJ45 control unit in a convenient location near the pool equipment. The control unit is the key hub for regulating and monitoring the operation of the chlorinator. You can easily access and control the chlorinator’s settings by securely connecting the control unit.
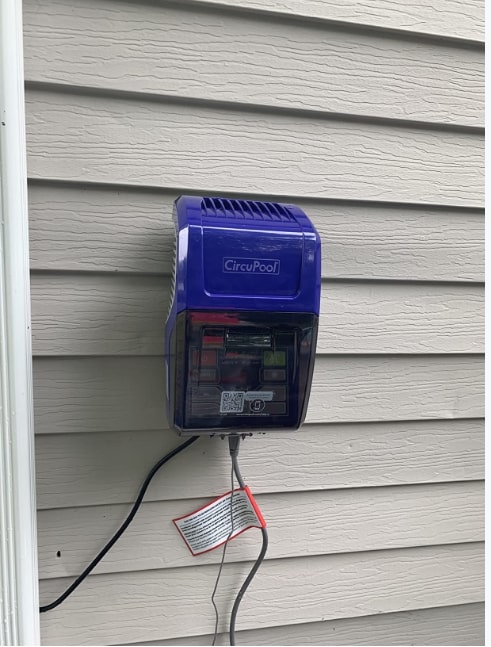
Installing the Control Module
Install the Control Module as close as feasible to the pump and filtration system. Install the Control Module no closer than 10 feet from the pool’s edge for safety reasons, and follow all applicable codes. Check that the Cell and Flow Switch cables can reach the Control Module from the plumbing portion of the pipe chosen.
The Module is completely qualified for outdoor usage; nevertheless, common sense factors such as limiting direct exposure to rain, sunlight, water runoff, and lawn sprinkler systems will extend its life. To avoid unnecessary heat buildup, avoid placing the controls over a heater or in tightly enclosed or insulated rooms, as with most electronics.
Secure the Control Module’s mounting bracket to a wall or vertical support at least 3 feet above ground level with screws. Controls should be hung on a bracket.
Connect the control unit
Connect the control unit to the cell housing by inserting the necessary cable connectors into their respective ports. These connectors provide communication between the control unit and the chlorinator, allowing for precise management of chlorine production levels and other parameters.
Check and secure all connections
After making the necessary connections, carefully inspect each connection point to ensure they are secure and properly tightened. Leaks or loose fittings might degrade the chlorinator’s overall performance. You maintain optimal functionality and minimize any faults by doing thorough checks and making any necessary adjustments.
Open the water and electricity supplies
Once the installation is complete and all connections are secure, open the main water supply valve to allow water to flow into the system. Simultaneously, turn on the circuit breaker to restore power to the pool equipment. These stages allow the chlorinator to start producing chlorine and dispersing it around the pool.
Configure and program the control unit
Follow the manufacturer’s instructions to configure and program the control unit based on your pool’s specific needs. Set the desired chlorine production levels and any other options that may be required. The proper configuration ensures that the chlorinator runs properly and that the appropriate chlorine levels are maintained in your pool.
After installation, run the pool system and closely monitor the chlorinator’s performance. Check the chlorine levels on a regular basis with a test kit and make adjustments as needed. Monitoring the chlorine levels allows you to keep the pool safe and balanced for swimmers.
Alright! You are all done with the installation of your chlorine generator. Now, you can generate chlorine as much as want(of course, there’s a limit). But shouldn’t you also learn how to add salt to pool with salt water chlorinator?
Troubleshoot 101: The issues with Circupool RJ45 and their solutions
Pool with little or no chlorine residual:
- Insufficient Chlorine Output Level: Increase the output level, especially during hotter seasons.
- Inadequate run time: Increase the run time to at least 1 hour per 10° ambient temperature and achieve a filter capacity turnover of 1.5-2 times.
- Heavy pool use, adverse weather, organic matter: Use the Super CL mode or shock the pool chemically.
Problems with water chemistry:
- Low Chlorine Stabilizer, pool salt, phosphates, or nitrates: Contact a pool technician to confirm that all chemicals are within the recommended range.
Concerns about cells:
- Cell is unclean, congested, or has an excessive amount of scaling or mineral build-up: Remove the Cell from the plumbing system and check and clean it.
- The flow switch is not triggered, and there are too many bubbles/air in the cell: Examine the Flow Switch and ensure enough water flow.
- The unit is inactive and the power is turned off: Start the system or check the power supply.
Low or no chlorine residual in the pool after recent installation:
- Prior to system installation, the water chemistry was not balanced: Contact a pool professional, double-check that all chemicals are within safe limits, and chemically shock the pool if necessary.
The Cell Maintenance LED is turned on:
- The Electrolytic Cell must be cleaned: Stick to the directions in the manual.
Salinity-related problems:
- The salinity is too high: Using the specified parameters, check the salinity.
The No Flow LED is illuminated:
- Check the water level, pump cavitation, air or blockages in the piping, clean filters and strainers, and verify adequate flow rate.
You can also check the Circupool RJ45 manual to troubleshoot your problems.
Conclusion
Congratulations! You have successfully installed the Circupool RJ45 and gained control of your pool’s maintenance.
You have set yourself up for a hassle-free and effective pool care routine by following the step-by-step directions offered in this book. You may enjoy the benefits of a chlorine-generating system that maintains your pool clean and sanitized without the need for manual intervention with the Circupool RJ45.
Say goodbye to chemical handling and hello to more time spent relaxing in your pristine pool. Return to this tutorial if you need a reminder or troubleshooting advice. When you have any other queries- how long should I run my Salt Chlorinator, don’t forget to knock on our doors as we’ve got everything about pools right here.
And if you don’t get what you hoped or looking for, contact a professional swimming pool service or directly contact Circupool Customer Service. Have fun swimming!